1. Open your Bat Boy picture in Photoshop.
Finish it first if you haven't already.
2. Open the zit picture in Photoshop (without closing the other one).
Drag it to the icon on the Dock or click on "File-->Open" while in Photoshop.
3. Select the elliptical selection tool:
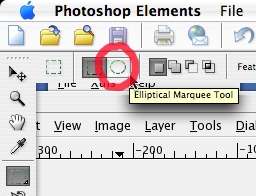
4. Use it to select the area around the face of the zit picture in the shape of an oval.
If you screw up, click somewhere else, then try again.
5. Click on Edit-->Copy from the menus at the top of the screen.
6. Click on the other image open in Photoshop (the Bat Boy image window).
7. Click on Edit-->Paste from the menu at the top of the screen.
8. Click on the move tool ( ![]() ), then position your pasted image where you want.
), then position your pasted image where you want.
I positioned my pasted zit picture on the right side of the screen.
You can size it, too, while you're at it. See the sizing handles?
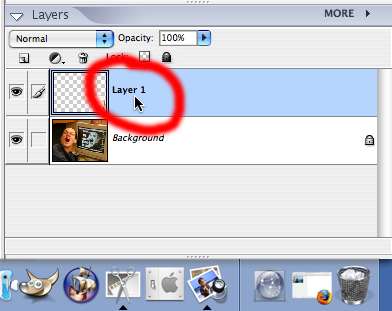
9. Double-click on the name "Layer 1" in the layer window and change the layer's name to "zits":
10. Repeat the steps above to paste the "bad photo" that you fixed in its own layer.
11. Repeat the steps above to paste the "blimp" at the top of the image in its own layer.
This time, select the whole image instead of an oval by clicking on Select-->All from the menu at the top of the screen.
After you've pasted it, click on the eraser tool from the toolbar on the left and erase the blimp's background. Neat, huh? Here's what the eraser tool looks like:
12. Repeat the steps above to paste the Katie Couric image in its own layer.
This time, use the rectangular selection tool to select only the newly-thinned Katie Couric before pasting.
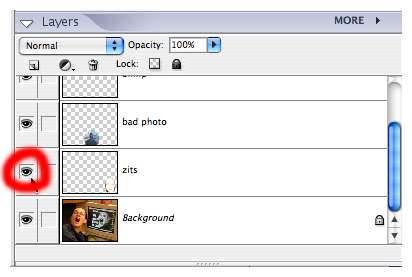
13. To see if you did this right, click the "eyes" to the left of each layer.
In the example below, clicking on the eye will cause the zit layer to become invisible.
Click in the same spot to make it visible again.
14. Everything OK? Save your image on the desktop under a different name. Leave it in separate layers; no need to flatten it. I'm going to ask you to show me the layers when I grade this.
15. BONUS: Click on a layer and adjust the "opacity" control at the top of the layer window.