|
 |
Bat Boy Assignment
Alter a regular person's picture to look like Bat Boy.
If you read Weekly World News, that fine journalistic publication found on the rack right next to the register at the grocery store, you probably have seen Bat Boy. Note the following things about Bat Boy:
|
|
1. Finding the Picture:
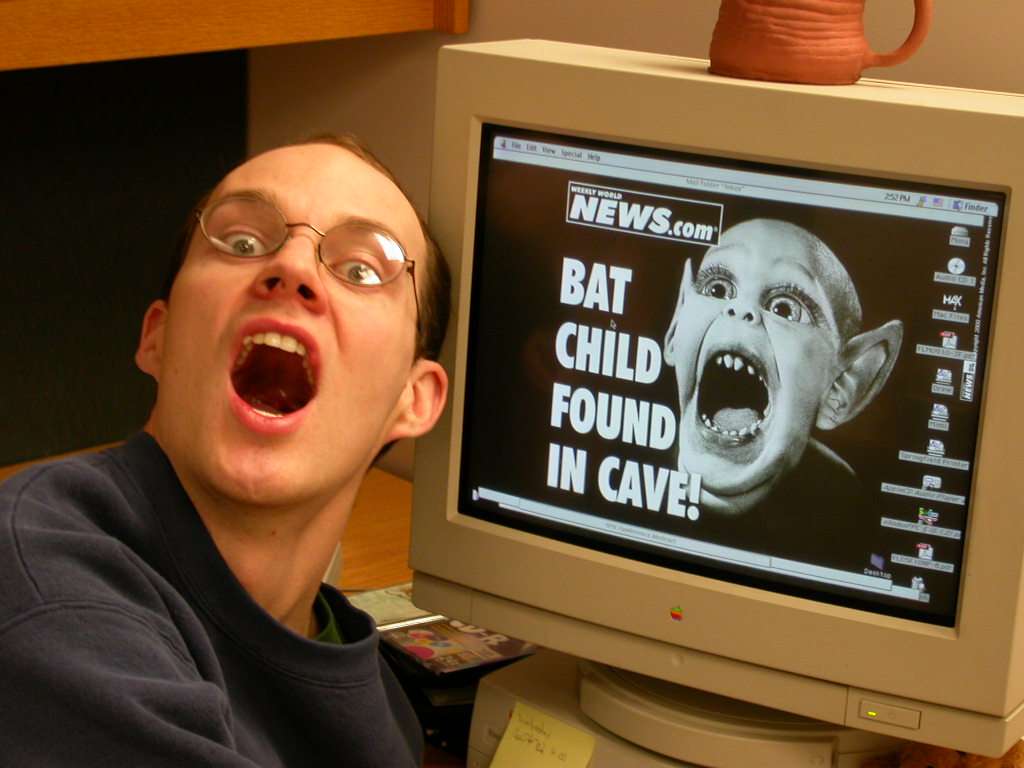
Click here for a large version of the image on your right (then download it to your desktop) . It's great for this project because it has a regular person's picture and Bat Boy in the same frame (it's from www.enel.ucalgary.ca, and we're using it with permission). Don't download the small picture to the right of this paragraph--it's too small, and will be blurry when you zoom in.
If you want, you can use another person's picture besides this one, but be sure that the picture is big (800 x 600 or bigger) and that the person has an open mouth, teeth showing, and ears visible.
Open the picture in Photoshop.
2. Making the Eyes Bigger:
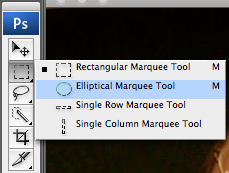
The rectangular selection tool isn't the best tool for the job here. Wouldn't it be nice if we had an oval instead? We do! You might need to right-click on the rectangular selection tool on the left toolbar in order to select the circle:
Now that you have that, draw an oval around the regular guy's left eye. Select Edit-->Copy. Now select Edit-->Paste. Again, it looks like nothing happened, but another eye was placed on its own layer.
Let's make the eye bigger. Select Edit-->Free Transform. Little boxes (sizing handles) will now appear around the floating eye. Click and hold on the sizing handle on the lower-right corner of the floating eye, hold down the shift key (this "constrains" it so that it doesn't change shape as you make it bigger) and stretch it out so that it's about 1/3 bigger. When you're done, click in the middle of the floating eye and position it over the old eye, and, when you're happy with it, double-click near the middle of the eye to finish the changes you made. Nice!
Click on Layer-->Flatten Image.
Do the other eye the same way. If you screw up at any time, remember that you can use Edit-->Undo or Edit-->Step Backward to get out of it.
Click on Layer-->Flatten Image when you're done with the second eye.
3. The Ears:
Make the ears bigger just as you made the eyes bigger. There's a problem, though: the oval (and the rectangular) selection tools won't work so well for the ears.
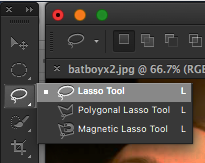
Instead, try selecting the ear with the lasso tool. There are three lasso tools, but you want to use the regular one:
To use this, hold the mouse button down as you trace around one ear, making sure to go all the way around. If you screw up while making your selection, let go of the mouse button, click somewhere else, then start again. Once you've selected the ear, copy, then paste, and use Edit-->Free Transform just as you did with the eyes to make the ears much bigger. I would make the ear about twice as big.
Again, click on Layer-->Flatten Image after you're done with the first ear.
Make the other ear big, too.
Now that the ears are bigger, we need to point them. To do this, we're going to use the smudge tool (the one that looks like a hand with one finger sticking out):
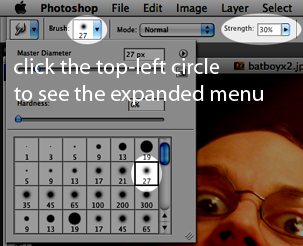
For this use of the tool, go for a size of about 27 and a strength of about 30:
To point the ears, click and hold the mouse button down inside one of his ears (near the top), and move the mouse up and away from his head to point his ear. You're literally smearing his ear up and to a point. Do this again from slightly different angles until you like the way it looks. Remember, you can always undo (Edit-->Undo, or hold down the command key to the left of the spacebar and press Z) if you screw up. Now do the same to the other ear until both of his ears are pointed. While you're there, you can smear the place where his new "big" ears contact his face to make it smoother.
4. Pointy Teeth:
You're going to use the smudge tool for this, too. Reduce the size of the tool to around 3 pixels and increase the strength to 100% like this:
Zoom in on his mouth by clicking View-->Zoom In a couple of times, then scroll over to the mouth. Alternatively, you can click on the magnifying glass on the toolbar to the left, click on the mouth to zoom in on that part, and then click on the smudge tool again.
Once you're zoomed in on the mouth, use the smudge tool to smear his open mouth up between his teeth to make his teeth look like triangles as it shows in the picture. Zoom out when you're done by clicking View-->Zoom Out.
5. Small Nose:
Select his nose with the regular lasso tool (just as you did with the ears). Now copy, paste, and use Edit-->Free Transform--only this time, make the nose smaller instead of bigger. Paste the nose slightly higher than the original one (as shown in the picture).
HINT: Copy-and-paste the nose AND the upper lip--that will help hide the original nose.
Click on Layer-->Flatten Image after you've pasted the nose.
To get rid of the original nostrils, use the smudge tool to smear the skin just above the lip with vertical strokes. I would adjust the tool size and strength first in case you just did the teeth--try 15 pixels and 30% strength for this one.
You can use the clone stamp to do this, too--or a combination of both clone stamp and smudge.
6. Double Chin:
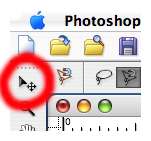
Using the lasso tool, select the chin. Copy and paste, then click on the Move tool (at the top left of the toolbar; see the picture below):
Using the move tool, move the duplicate chin just below his real chin. Now click on the smudge tool (the finger). Use the smudge tool to smooth out the edges using long left-to-right strokes following his chinline . If you do this well, it will look as if he has a bulbous double-chin.
Click on Layer-->Flatten Image after you've finished with the double-chin.
7. Save Under a Different Name:
Before you save, make sure that you have all of these:
- big, pointy ears;
- a small nose,
- big eyes,
- pointy teeth,
- and a double chin.
All there? Okay! Save the image under a different name (File-->Save As...) on your desktop, and you're finished.
8. BONUS: Want to make the image black-and-white?
Click Image-->Adjustments-->Desaturate. You don't have to save it like that, but you can if you like the way it looks.
Oh, by the way--ask me to show you what the guy in the picture sent me.

